Wednesday 30 May 2012

Part 1- The Frame


Exercise 1- Fitting the frame to the subject

Aims: Take 4 photo's of the subject at different compositions- thinking carefully about how the subject is placed in 3 of them (the first is taken without much consideration for the overall outcome of the picture)
             Compare the results.
             Crop one of the images to find alternative possibilities.

I had thought about using a smaller subject, but the barn I came across while walking seamed ideal for demonstrating how the subject fills the frame in different compositions.

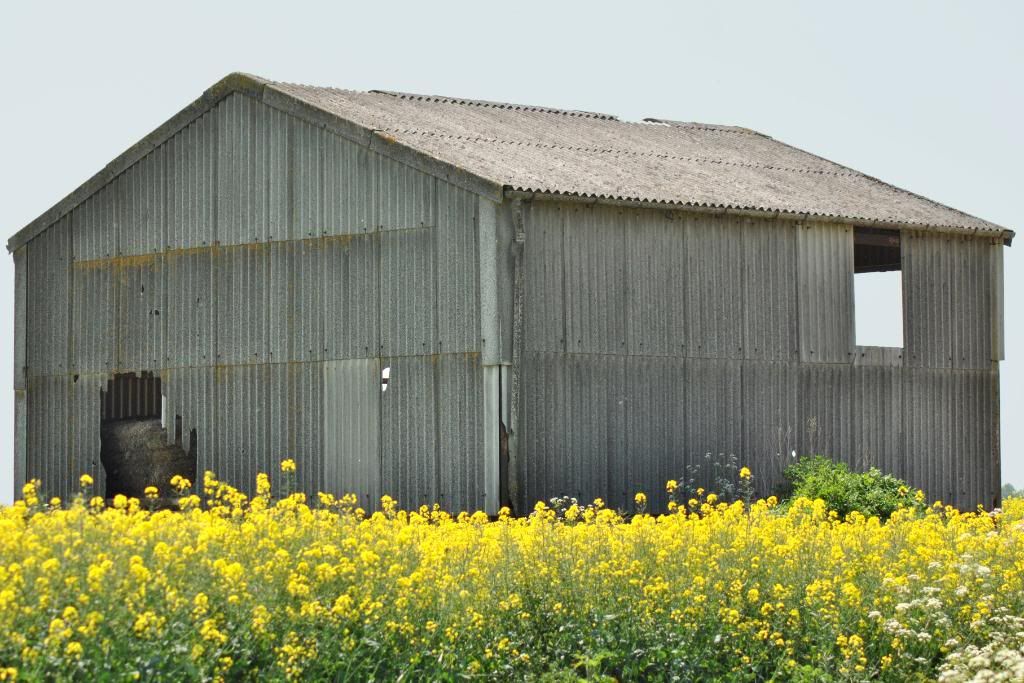
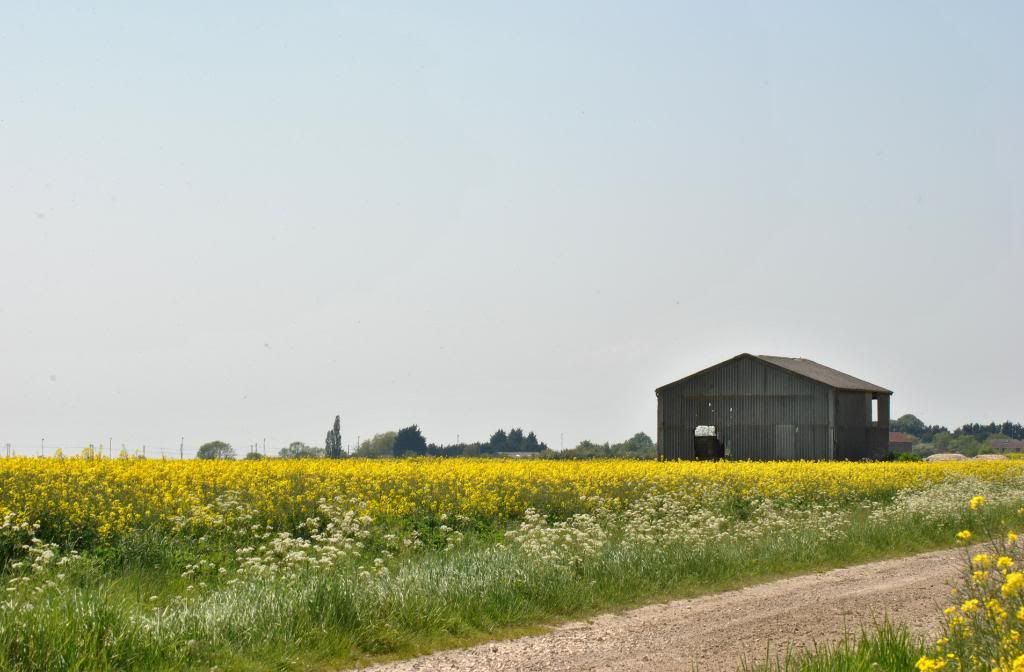
Here is the first shot, which is a baseline for the others:
This image was taken with the subject in the centre of the frame.  There are distracting building and trees along the horizon and in all it's not very well composed.

 Image two shows the subject fit almost exactly to the frame. I could not eliminate the space above or below the barn without cutting off the sides or cropping in post production so this was as close as I could get.

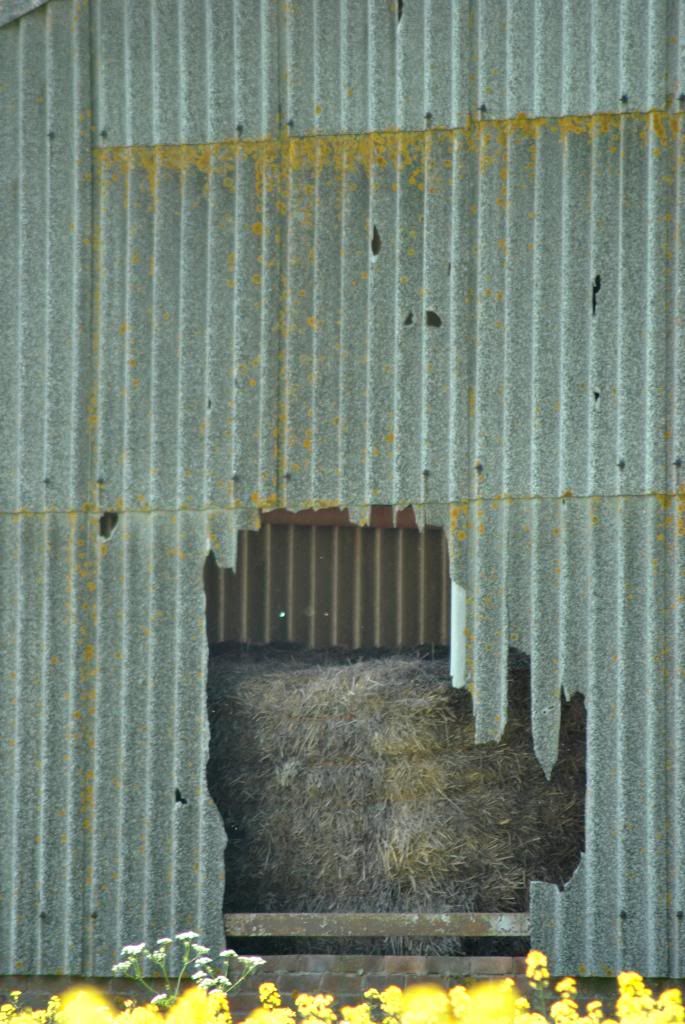
 I had two idea's for the detailed shot, one was the hole in the side of the barn, and one was the window. After comparing both, I decided to show the hole in the side where you can see more detail and texture than the two previous pictures.

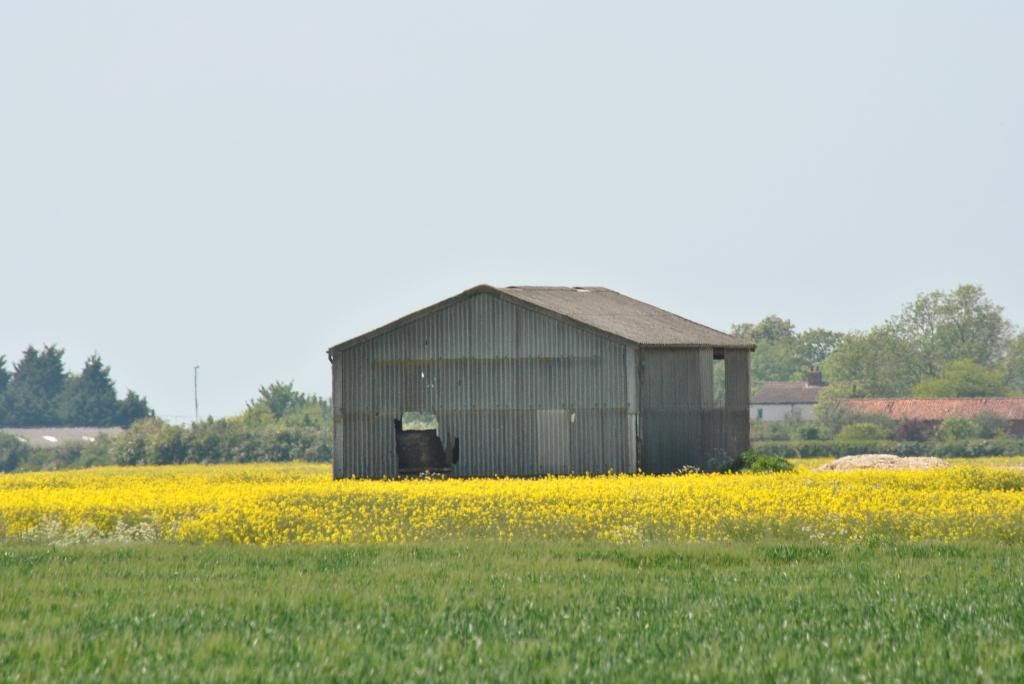
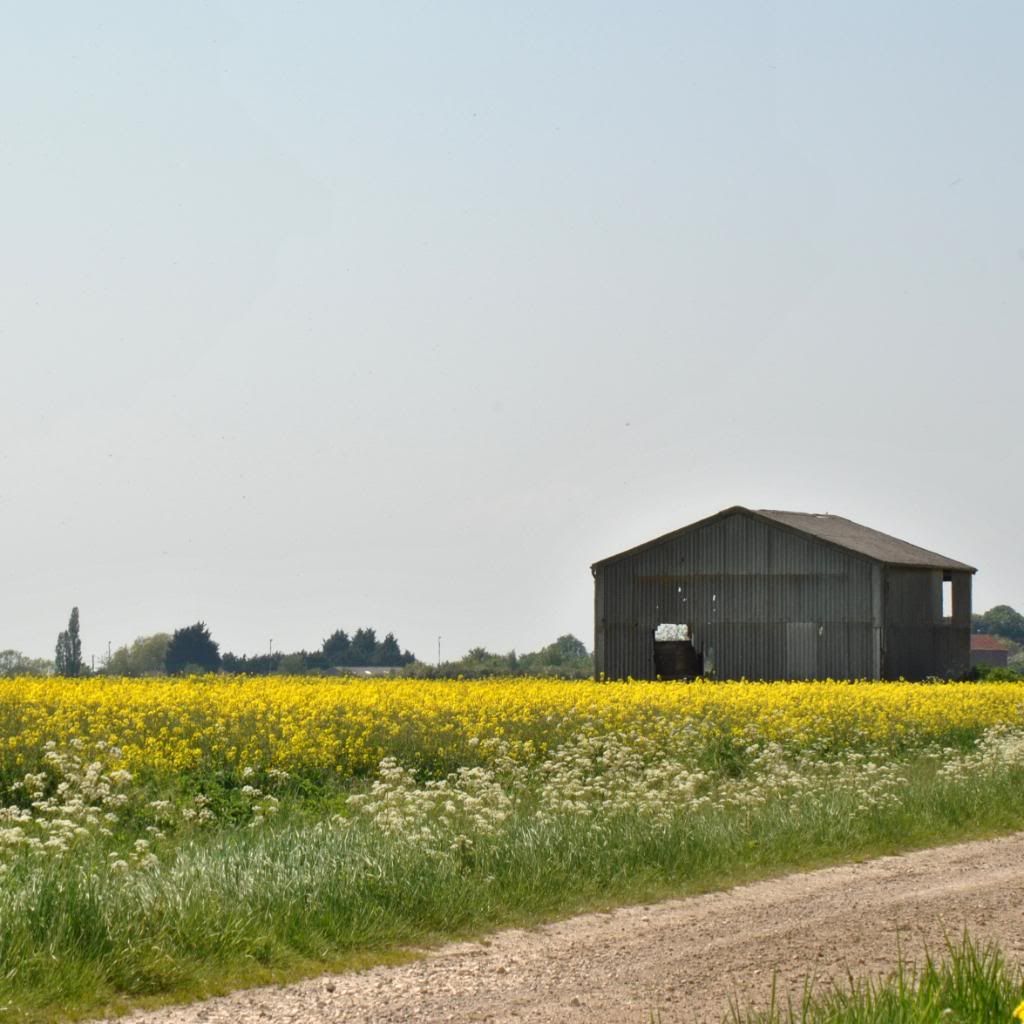
 With the last photo, the subject had to fill only 1/4 or less of the frame. This wide angle shot shows the barn from a further distance than the others. Although it is smaller, it is still a focal point in the picture. I like this one best as it shows the barn in an isolated setting and the amount of sky included  in the shot increases the sense of space and isolation. I also think placing the subject to one side helps make the photo more dynamic and interesting.

I chose to crop the 4th picture as I felt it would give be more options when thinking of different compositions.


 The first is a square crop, which is quite similar to the original, but I think it gives the image a more compressed feel.

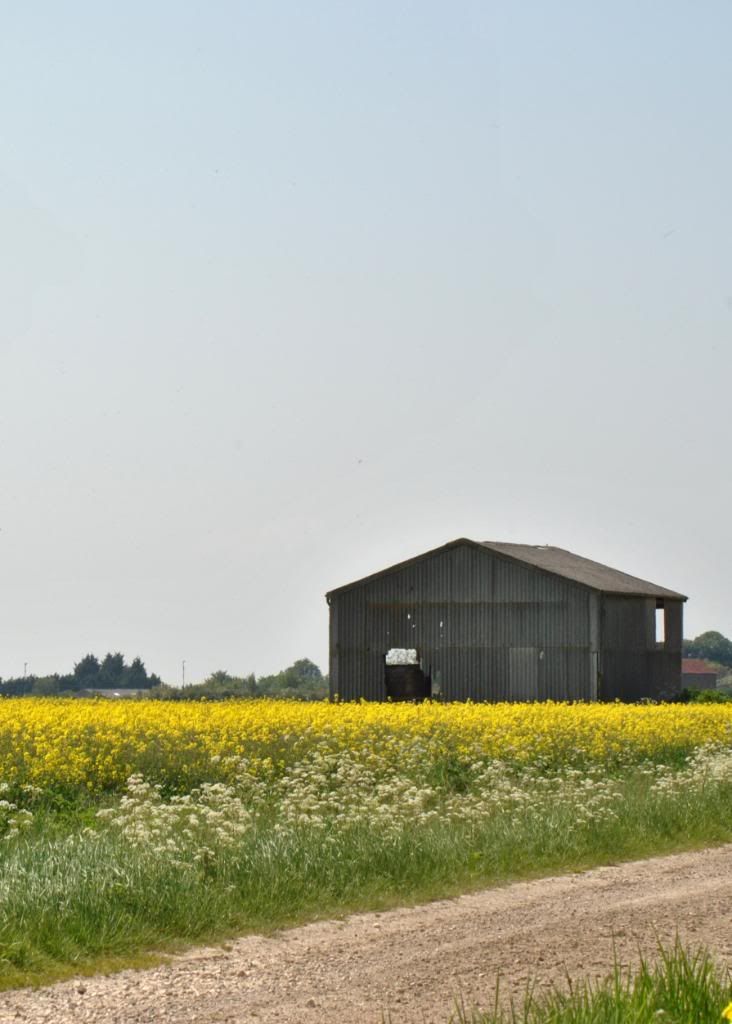
 I then used a portrait 5x7 crop. I think this photo (as with all the variations of the 4th picture) would be made more interesting with interesting cloud patterns, however I think the clear sky helps to give the sense of space and remoteness.

In conclusion, this exercise has taught me to think more about composition and how different angles and views of a subject can alter our impression of the photo.


Tuesday 29 May 2012

Photographing Movement- Part 2


Exercise 2- Panning with different shutter speeds
Aims:  Take 10-12 photo's of a scene with movement
             Take the pictures at different shutter speeds from fast to slow while following the moving subject with the camera
               Compare the results and explain which one I prefer and why

Before starting this exercise, I read an article online so I could gain more understanding of the technique required:  http://digital-photography-school.com/mastering-panning-to-photograph-moving-subjects

I still used a tripod for this exercise but loosened the head so I could easily track the subject.
Note: I have blurred the cars numberplate's for privacy reasons.

1.
 1/100     f8     ISO 100
I chose this as the first photo in the series as the higher shutter speeds were completely sharp and showed no sign of movement. This is the first where there is some blurring in the background, though it still doesn't suggest much, or fast, movement.

2.
 1/80     f9     ISO 100

3.
 1/60     f10     ISO 100

4.
 1/50     f13     ISO 100

5.
 1/40     f14     ISO 100

6.
 1/30     f14     ISO 100

7.
 1/25     f16     ISO 100

8.
1/20     f18     ISO 100

9.
 1/13     f25     ISO 100

10.

1/8     f29     ISO 100

As you can see from the pictures, as the shutter speed decreases the effect of motion is increased before the subject becomes too distorted and blurred to see clearly.  From pictures 6 to 8, I think the image is balanced just enough to create the effect of speed while retaining sharpness on the car. The background is also still recognizable but streaked to give the impression of movement as well as direction. As the shutter speed gets slower, it becomes harder to pan with all or most of the car in focus. Image 10 seams sharper than 9, though I think this is due to accuracy on my part.

This image (6.) is my favourite of the series


Photographing Movement- Part 1


Exercise 1- Shutter Speeds
Aims: Use a tripod to take 10-12 photo's of a scene with movement.
             Take the pictures at different shutter speeds from the fastest possible to slowest.
          Find the slowest speed where the movement is still frozen.
          Compare the results and explain which one I prefer and why.

I decided to show a dog jumping an obstacle to show movement for this exercise. I used a tripod to maintain the angle and position of the camera and to reduce camera shake which would have become a problem especially with the slower speeds. I  had the camera set to Shutter priority mode so I could easily change the speed of the shots while the aperture changed automatically to maintain the exposure of the images.

1.
1/4000     f3.5     ISO 800
The first picture was taken at the fastest possible speed of 1/4000. I changed the ISO to 800 so along with the wide aperture, the photo was not underexposed, despite the fast shutter speed.  As expected, the picture is very sharp and there is no sign of motion blur at this stage.

2.
 1/320     f11     ISO 800
This second photo is just starting to show signs of blurring (around the paws of the dog), which makes 1/500 my slowest sharp shutter speed.

3.
 1/160     f16     ISO 800
This picture is showing definite blur which is becoming more pronounced as the shutter speed decreases.

4.
1/80     f22     ISO 800
Very similar to the previous photo, the blurring of the moving subject is becoming much more significant.

5.
 1/60     f22     ISO 800
Again, the subject is getting less defined and recognizable. In reflection, I think I should have lowered the ISO at this point instead of waiting 2 more photo's as the exposure is now noticeably lighter.

6.
 1/20     f22     ISO 200
I have now lowered the ISO to maintain more of a normal exposure. The subject is now hardly recognizable.

7.
1/15     f22     ISO 200

8.
 1/10     f22     ISO 200

9.
1/8     f22     ISO 200

10.
 1/4     f22     ISO 100

I could not lower the shutter speed and further as the pictures were becoming too overexposed. I could have helped correct this with a Neutral Density filter to allow slower shutter speeds with a more correct exposure.

I had never really thought about using slow shutter speeds to show movement, but rather fast speeds to freeze the action, so I was surprised with how pleasing I found some of the slower shots. I had some problems with overexposure with the later shots, which even without an ND filter, I could also have corrected by taking the photo's in darker conditions (the bright sunlight worked to my advantage with the faster pictures, but not the slower ones).

The pictures I liked best are the first (fastest) and last (slowest) as I think both create the impression of speed and movement in their own way. The first picture shows movement by the subject being suspended in a position we the viewers know as having movement whereas the last picture shows movement through the blur of the subject as it moves across the frame while also creating an abstract effect. I least liked the photo's 3 to 6 as the effect they create is not as striking as either extremes of shutter speed.

Focus- Part 2


Project- Focus (part 2)
Exercise 2- Focus with a different apertures

Aims: To take 3 photo's of a of a row of objects to demonstrate different apertures
             Take each of the pictures at a different aperture from wide to narrow
             Print the photo's and mark the depth of field on each print

For this exercise, I decided to use a row of railings to show the difference in apertures and the effects it has on the picture.
 1. f4.5     1/1600     ISO 200

2. f10     1/400     ISO 200

3. f29     1/50     ISO 200

As the photo's demonstrate, the wide aperture has a small depth of field which draws the eye quickly to the focal point with the rest of the picture out of focus. A narrow aperture has a much wider depth of field making it useful for subjects such as landscapes.

This exercise also shows how aperture control's light as the wide aperture needs a fast shutter speed to balance the exposure and the narrow aperture needs a slower shutter speed.


Friday 25 May 2012

Focus- Part 1


Exercise 1- Focus with a set aperture

Aims: To take 2-3 photo's of a scene that shows depth
             Focus each of the pictures at a different distance (using widest aperture possible)
             Compare each of the photo's and explain which one I prefer and why

I decided to use small bottles of scented oil for this exercise. I am using natural light from the nearby window and all 3 pictures were taken using a tripod to ensure both consistency and sharpness.


 f5.6 
1/13
ISO 100


f5.6
1/13
ISO 100


f5.6
1/10
ISO 100


Photo 1 is focused on the nearest bottle, Photo 2 is in the middle and Photo 3 is focused at the bottle furthest away. When you look at the pictures, your eye is drawn immediately to the point of focus, and then to the rest of the scene.

I think image 1 is most pleasing to look at as you quickly focus on the subject in the foreground and are then led through the picture. I think this also helps to create the perception of depth. I also think I prefer image 1 because we tend to focus on objects closer to us, then look further away, which is also how we are led through this photo.

I think as the focus is in the centre of image 2, it a appears a little flat and uninteresting. Having said that, I do like the balance of the equal portions of the picture that are out of focus. I still prefer it to the third image, but i find the first picture much more interesting.

I felt I should have liked image 3 best as the eye is drawn naturally through the picture to the point of focus, however in this scene, I felt there is a tendency to just sweep through the image and lose interest quickly. As a result, I think this is the weakest of the series.

Introduction- Getting to know your camera


Exercise 1 Focal length and angle of view

Aims: To find the "standard" focal length of my camera
             Take 3 photo's from the same point from standard, wide angle and telephoto focal length.
            Print the photo's and hold them from the same point that I took them, noting the distance from my eye to the print when both images appear the same size.


I used my 18-55mm lens for the first two photo's. Finding the standard focal length was a new experience and I found it strange to take the photo's with both eyes open as opposed to just looking through the viewfinder. I found the "standard" focal length was 55mm. I had expected the result to be around 25mm as my camera has 4/3 size senser, but after repeating the exercise several times, I still got the same results. I suspect reasons for this could be the 1.5x crop factor and the 0.8x viewfinder magnification, but I will read more about this to make certain. (http://www.dpreview.com/products/nikon/slrs/nikon_d3000).


The wide angle photo was taken at 18mm focal length


I changed to my telephoto lens and took the photo at 300mm focal length.

I then printed each on A4 paper and stood at the same point where I took the photo's. Holding them out in front of me, I matched the photo so it was the same size as the object. I found that the distance between my eye and the first photo (standard) was about 55cm. The wide angle distance was about 18cm and the telephoto was around 3 meters.
The standard print was held comfortable distance, whereas the wide was too close and the telephoto was too far to hold, even at arms length.
55mm -> 55cm (550mm)
18mm -> 18cm (180mm)
300mm -> 300cm (3000mm)

Wednesday 23 May 2012

In the beginning...

So this is it! My course materials arrived yesterday and I spent the rest of the day reading through them, there is certainly a lot of information to get my head around, but hopefully everything will become clearer once I start. I'm feeling exited but a bit nervous, I can't wait to start my first project though! I've flicked through "The Photograph" book supplied and it seams very interesting, I'll start to read it properly later.
More updates to come,
Amanda