Thursday 28 June 2012

Cropping


Part 1-The Frame
Exercise 7- Cropping and  Extending
Aims: Take 6 already taken photo's of different subjects that you think could be improved by cropping.
           Compare before and after and explain your decision to crop

This exercise made me look at photo's where I was previously happy with the composition, and re-evaluate them to see how they could be improved by cropping. This was interesting because it really made me look at the pictures in a different light and to explore different possibilities for the overall composition.

1.


 I chose to keep this picture much the same, but removed part of the sky as I found the sun distracted the viewer from the silhouetted tree's and house which were my main subject. I felt that the slight crop placed more emphasis on the main elements while keeping the same overall effect of the photo.

2.


I decided to use a portrait crop for this picture. Personally, I think both before and after works for the picture, but crop makes it look slightly better. It creates the sense of height I was looking for, which is emphasized by the Ladybird looking downwards over the edge.
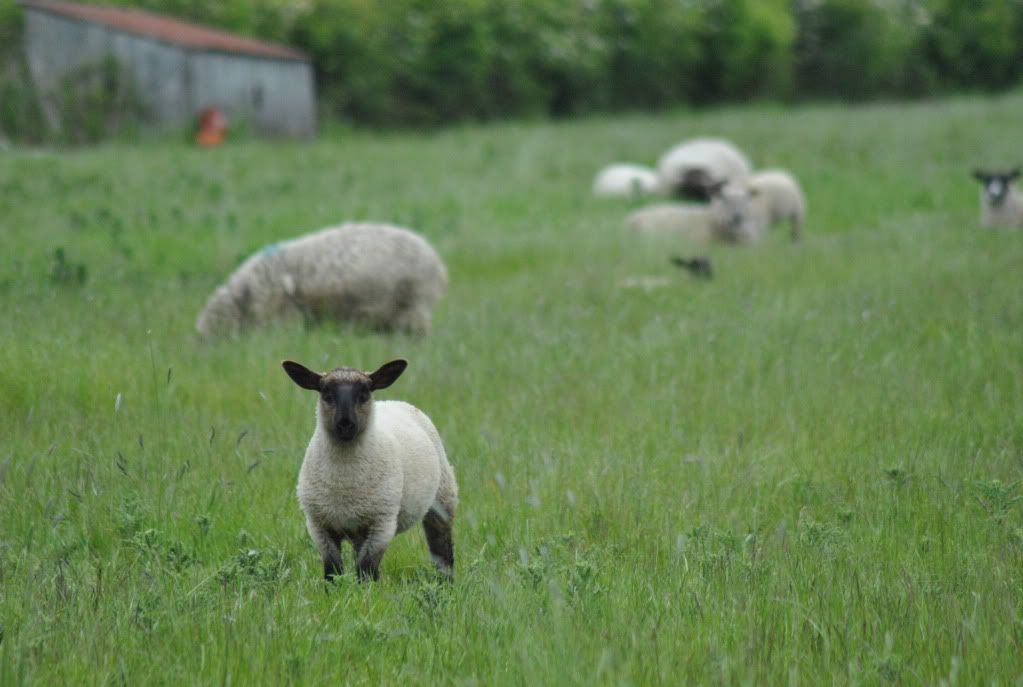
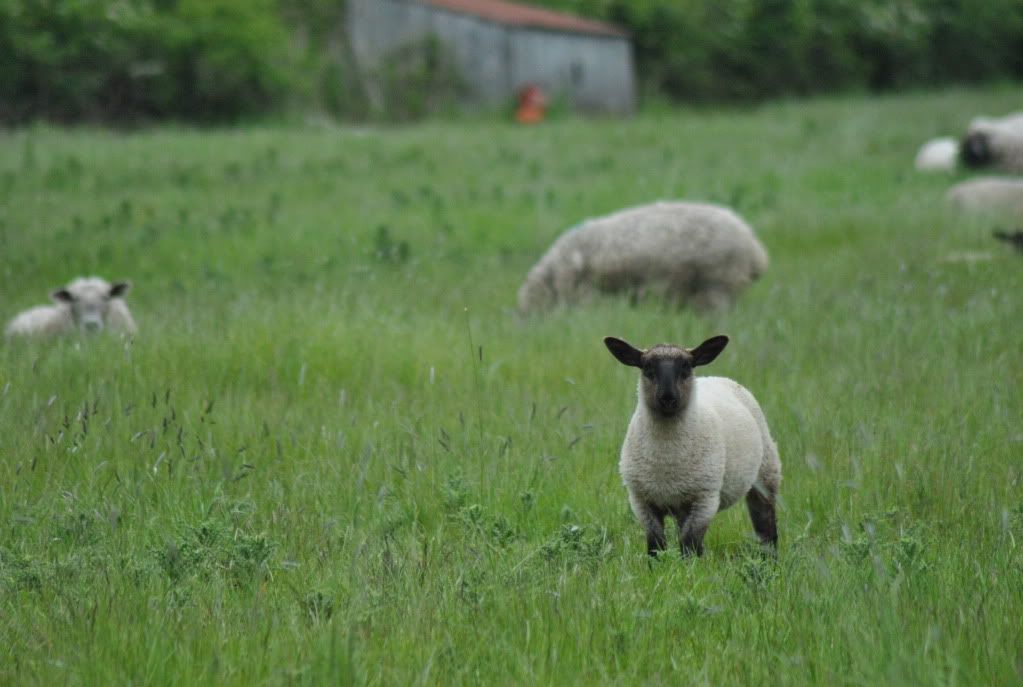
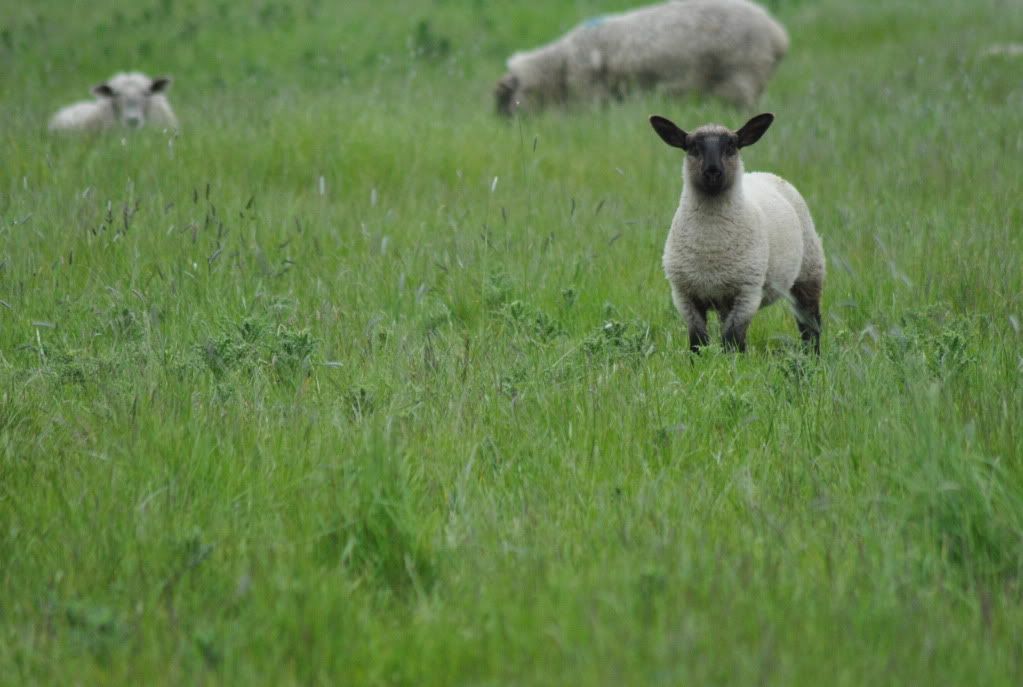
3.


For the third picture, I again used a portrait crop as I felt It better suited the effect I was trying to acheive. I think this is because the strong vertical lines in the photo compliment the portrait crop.

This exercise really forced me to look back at pictures I was previously happy with, in order to change them. This was challenging at first as I had felt at the time they could not be inproved by cropping, though as I continued the exercise, I began to take more notice of the pictures in a new way to see things the had missed before.

Positioning the Horizon


Part 1-The Frame
Exercise 7- Positioning the Horizon
Aims: Take 6 photo's of a landscape with a horizon
          Place the horizon in different parts of the frame in each picture
              Compare the results

1.


I had not read the exercise requirements properly before starting it so I only have 5 pictures instead of 6. I'll pay more attention in future to make sure I don't repeat this.
The first of my series shows the horizon at the bottom of the frame. The emphasis is on the sky (which would have been made more interesting with interesting cloud patterns) and only a little attention is given to the pier and beach. Personally, I don't think this horizon line works, although I can't rule out this composition in all future pictures as in some suituations it work better.

2.

The second picture has the horizon line near the centre of the image. I like this picture best as although the frame is divided close to the middle, I think it places equal emphasis on the sky and pier/beach in the lower part of the frame.

3.

Very similar to the previous photo, but the horizon is in the centre, creating a somewhat static but not unpleasant (personally) effect.

4.

The beach has become the dominant feature in this picture, followed by the pier. The sky now has less emphasis as it fills less of the frame.

5.

With this last picture the horizon is again at the top of the frame. The sand is now even more dominating and there is hardly and sky showing. I think that although it could work for some pictures, the extreme positioning of the horizon looked less effective than the previous photo's.

This exercise has shown me that you should not automatically disregard any particular horizon position such as exremely high or low or in the centre of the frame, and that I should consider all posibilities based on the particular landscape at the time.


Balance


Part 1-The Frame
Exercise 6- Balance
Aims: Take 6 already taken photo's and divide the frame into the different elements that create balance.
           Sketch a weighing scale for each showing the dominant parts of the picture.
              Compare the results


I found this exercise interesting as I had never really looked at images in terms of balance before. I found some pictures easier to divide than others, but mostly the photo's had  clear elements with which to judge balance with.

1.


2.

3.

4.

5.

6.


As said before, I found some photo's easier to divide than others. From the pictures I chose, the majority had very distinct elements with the exeption of no3 which I was unsure wheather to add the building or not. I decided to in the end because although in the background, I think it does still draw attention and so contributes to the overall balance of the picture.  Pictures 1, 2 and 5 are balanced by a bigger subject near the centre of the image with a smaller suject nearer the edge. Photo's 3 and 4 appear unbalanced with the scales but for me, they work in their own way (albeit not conventional), although I prefer the balance in picture 4 better than the 3rd picture. The last photo shows a symetrical balance, where both prominant elements evenly spaced and the same size in the frame.
This exercise has made me look at my pictures in a different way, not just in terms of composition but the balance within the picture, and how it affects the image as a whole.


Friday 22 June 2012

Focal Lengths 2


Part 1-The Frame
Exercise 5- Focal Lengths and different Viewpoints
Aims: Take 2 or more photo's of a scene with depth
           Take the photo's at different focal lengths from wide angle to telephoto, making sure the subject fills    the frame in both photo's.
              Compare the results

I used the statue of "The Jolly Fisherman" for this exercise as it would clearly show the differences in perspective for both focal lengths.


Photo 1 (telephoto) was taken at 70mm. I had to stand around 10 feet away from the subject in order for it to fill the frame. The main points I notice about the longer focal length is that it is difficult to judge the size of the subject, and the base of the statue appears rather flat as opposed to circular. The background is in focus enough to allow the viewer to get a sense of the area as you can make out fairground rides and attractions behind the subject.


Photo 2 (wide angle) was taken at 18mm and I was standing very close to the subject . You can clearly see the dramatic difference between the two focal lengths. The subject has more depth than in the first photo, and you get more of a sense of the size of the statue. You can also see more of the background in this picture. Not only is it sharper, but you can see more of the surrounding buildings which helps give a sense of the setting. 

This exercise has shown me how by using different focal lengths, you can change the perspective, and so the impression the photo gives. The telephoto picture makes the subject appear more isolated but flatter whereas the wide angle gives some sense of scale and depth but does not separate the background from the subject as effectively as using longer focal lengths. I think both extememe's can work as well depending on what impression you want to convey. I think it is important to take into account how the subject will look from both perspectives before taking the photo.

Focal Lengths 1

Part 1-The Frame
Exercise 4- Focal Lengths 1

Aims: Take 3 to 10 photo's of a scene with detail in the distance
             Take the photo's at different focal lengths from wide angle to telephoto, changing lenses if possible
              Compare the results 

For this exercise, I chose a fairly plain scene with a house in the distance which would help show the effect of the different focal lengths. The exercise would have been easier if I had used a tripod as it was very overcast and dark so I had to use slower shutter speeds. I took 6 photo's with two lenses, a 18-55mm and 70-300mm which clearly demonstrated how focal lengths affected the picture. 

1. 18mm
This is the widest view where you can see a wide open field with a house in the distance. I chose the house as the main focal point for this exercise.

2. 34mm
Very similar to the first photo, but you can start to see more detail in the trees and house in the distance. Some of the detail seen in the foreground in picture 1 is also being lost as I zoom in on the house.

3. 55mm
Again, there is not much difference other than the increase in detail for the objects far away. This is close to my "standard" focal length.

4. 70mm
I have now changed to my telephoto lens and as with the previous photo's you can see more and more detail in the houses and trees accross the field.

5. 100

6.300
At the furthest possible focal length, you can clearly see the details in the house that were impossible to pick out in the first photo and unlike the wider focal lengths, you cannot see much of the landscape surrounding the house.

You can clearly see how as the focal length increases you can see more detail in things father away but you lose the wide view. This exercise was interesting as it makes you consider how you can change a photo by using different focal lengths depending on what effect you want to portray.


Saturday 9 June 2012

Object In Different Positions In The Frame


Part 1-The Frame
Exercise 2- Object in different positions in the frame

Aims:    Take 4 photo's of the same subject in different parts of the frame
             Make sure the background is as clear and even as possible
             Compare the results

It was challenging to find a subject with a clear and plain background, but In the end, I decided on a grassy field as it was relatively uncluttered and free from distractions. I took 4 photo's for this series. The first was taken quickly and with no consideration for the composition or where the subject was placed in the frame. The second was to the bottom left. The third had the subject in the bottom right and the fourth was in the top right corner.


1. This was the photo taken quickly and naturally, and shows the subject in the middle of the frame. I think we naturally compose photo's in the centre because we tend to directly focus on things that are directly in front of us. Despite the notion that pictures should ideally be composed with the main subject just off centre, I feel in this instance having the subject in the middle of the frame does not ruin the photo. This is not my favourite, but I do not dislike the photo.


2. This shot was taken with the main subject to the bottom left of the frame. Having more background behind the subject gives the viewer a sense of the setting but I think the background in this photo is a bit too cluttered. As stated previously, I had a little trouble finding a clear and even background.


3. This is very similar to picture 2 but the subject is in the bottom right corner of the frame. Like with the previous picture, I would have preferred the background to be free from distractions, but I still think this photo works slightly better than the first.


4. This is the last shot and my least favourite of the series. The subject is in the top right corner. I think this is because the amount of grass in front of and around the subject makes the picture feel compressed and to me it feels slightly awkward. The viewer also does not get the same sense of the setting in this photo compared to this others.


After comparing the pictures, I like photo 2 best, closely followed by the first picture. Although the third picture is very similar to the second, I do not like it as much as the second. I like the fourth photo the least.
This exercise has taught me that there are no set rules for composing pictures, and that what works for one shot does not necessarily work for another. The subject, background and theme your trying to convey all affect how you should place the subject in the frame and staying with one rule for composition will not  necessarily guarantee a good photo.